How to Make Almond Milk at Home in 5 Easy Steps
Learning how to make almond milk at home is one of the simplest ways to upgrade your kitchen routine while taking full control over what goes into your body. While store-bought versions are convenient, they are often diluted with water and contain synthetic thickeners like carrageenan or added sugars that diminish the natural nutritional profile of the nut. By making it yourself, you ensure a higher concentration of heart-healthy fats and vitamins without the unnecessary additives.
Beyond the health benefits, the DIY approach is significantly more sustainable. Creating your own plant-based milk helps reduce single-use packaging waste and allows you to source high-quality, organic almonds in bulk. Whether you are looking for a creamier consistency for your morning coffee or a clean base for your smoothies, this 5-step process will yield a fresh, nutty flavor that commercial brands simply cannot replicate.
What You’ll Need (Ingredients & Equipment)
To master how to make almond milk at home, you don’t need a pantry full of ingredients or professional-grade culinary tools. The beauty of this recipe lies in its simplicity, requiring just two primary components and a few basic kitchen essentials.
The Ingredients
-
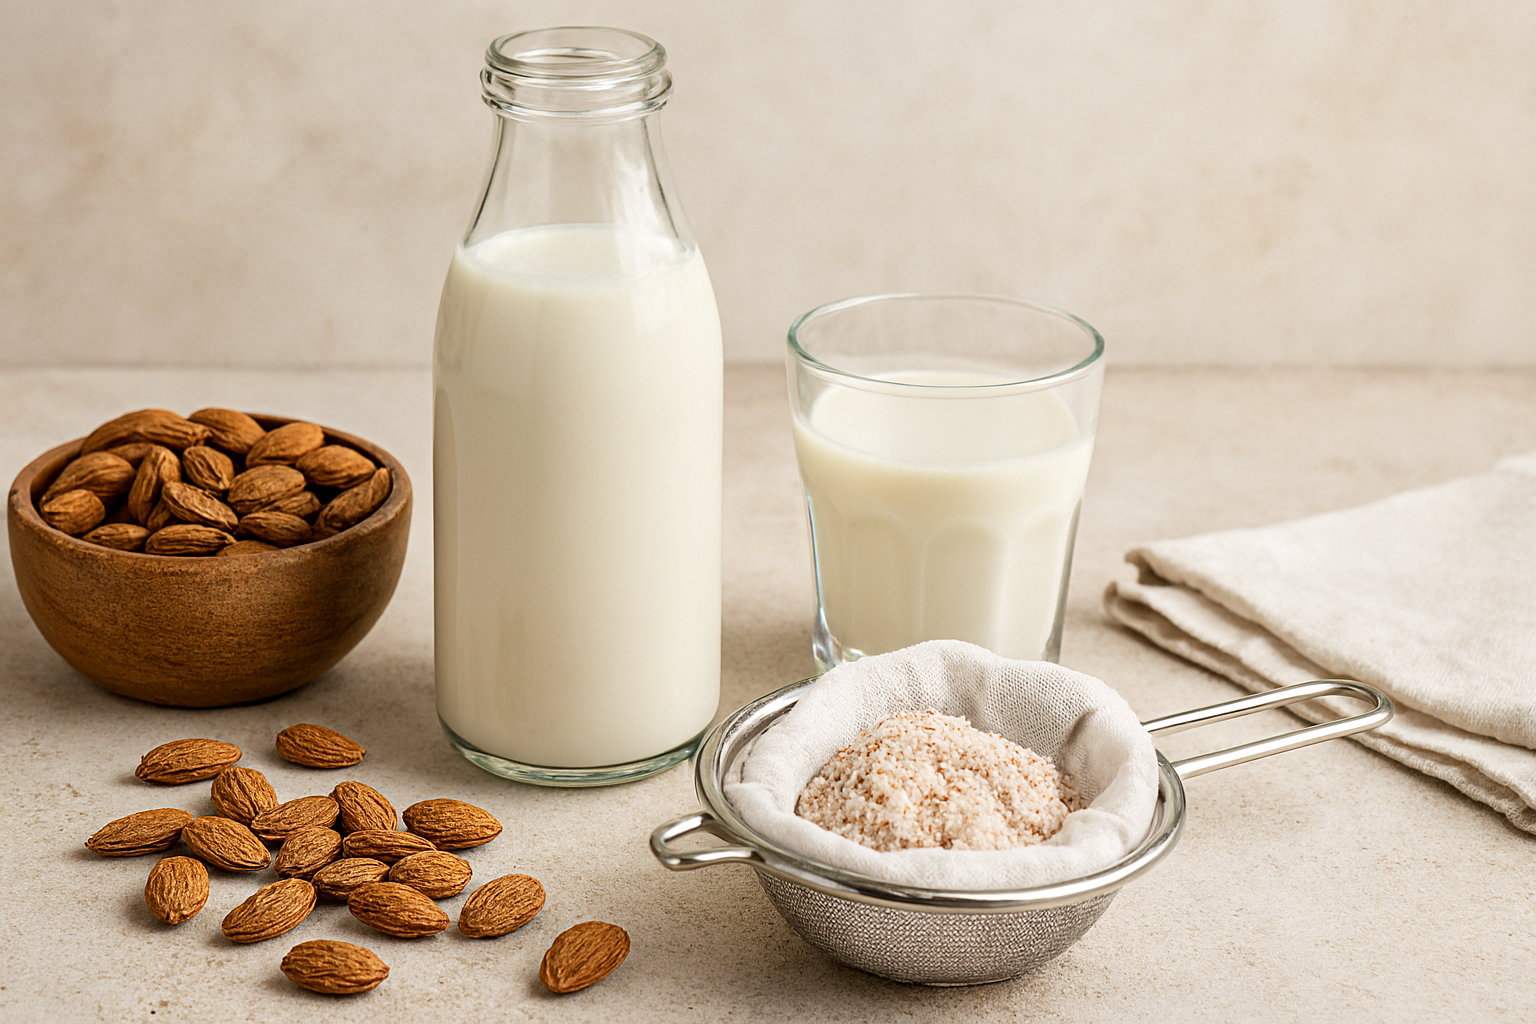
1 Cup Raw Almonds: It is essential to use raw, unroasted almonds to ensure the milk is creamy and the nutrients remain intact. If possible, opt for organic almonds to avoid synthetic pesticide residue.
-
4 Cups Filtered Water: High-quality water results in a cleaner taste. You will also need extra water for the initial soaking process.
-
Optional Add-ins: To customize your flavor, consider a pinch of Himalayan sea salt for balance, a splash of vanilla extract, or a date for natural sweetness.
The Equipment
-
High-Speed Blender: A powerful motor is key to breaking down the almonds into a smooth, fine consistency.
-
Nut Milk Bag: This is the most efficient tool for straining. Buy nut milk bag Here. However, you can also use a fine-mesh cheesecloth or a clean, thin linen towel.
-
Large Mixing Bowl: You’ll need this to catch the milk as you strain it.
-
Glass Storage Jar: A 32-ounce Mason jar or a glass carafe is ideal for keeping your milk fresh in the refrigerator.
How to Make Almond Milk at Home
Step 1: Soak Your Almonds
The first essential step in how to make almond milk at home is the soaking process. Place your raw almonds in a bowl and cover them with about an inch of water. Let them soak at room temperature for at least 8 to 12 hours, or overnight.
Soaking is crucial because it softens the almond’s cellular structure, making them much easier to blend into a creamy liquid. Furthermore, soaking helps reduce phytic acid, an “anti-nutrient” found in nuts and seeds that can interfere with the absorption of minerals like calcium and magnesium. If you are in a rush, you can soak them in very hot water for 1 to 2 hours, though the overnight method yields the creamiest results.
Step 2: Rinse and Drain
Once your almonds have finished soaking, you will notice the water has become slightly cloudy or tinted. Drain the almonds using a colander and discard this soaking water entirely—do not use it for making the milk, as it contains the displaced phytic acid and bitter tannins from the skins.
Rinse the almonds thoroughly under cold, running filtered water. At this stage, some of the skins may begin to slip off; while you don’t need to peel them, removing the skins can result in a slightly whiter, smoother milk. According to food safety guidelines for nuts, ensuring your produce is properly rinsed helps remove any surface dust or debris before the blending process begins.
Step 3: Blend with Fresh Water
Now that your almonds are prepped, it is time for the transformation. Place the soaked, rinsed almonds into your blender and add 4 cups of fresh filtered water. If you prefer a thicker, “creamer” style milk, you can reduce the water to 3 cups. Need a good blender? Take a look at these recommended high speed blenders.
Blend on the highest speed for about 60 to 90 seconds. You are looking for a uniform, milky white consistency where the almonds have been pulverized into very fine particles. A high-speed motor is beneficial here to ensure you extract the maximum amount of nutrients, such as vitamin E and healthy monounsaturated fats, which are released during the emulsification process.
Step 4: Strain the Mixture
This is the most satisfying part of learning how to make almond milk at home, as it separates the liquid from the solids. Drape your nut milk bag or cheesecloth over a large mixing bowl and slowly pour the blender contents into the center.
Gather the top of the bag and use your hands to squeeze and knead the pulp firmly. Continue this “milking” motion until all the liquid has been forced out into the bowl and only a dry-ish pulp remains inside the bag. This mechanical separation ensures a silky-smooth mouthfeel, avoiding the grittiness often found in unfiltered plant milks. Set the remaining pulp aside in a separate container, as it is a valuable ingredient for other recipes.
Step 5: Flavor and Chill
With the straining complete, you are left with a bowl of pure, unadulterated almond milk. If you prefer a neutral taste for cooking or savory recipes, you can leave it as is. However, many find that a few simple additions make the milk truly shine.
Whisk in a pinch of salt or a drop of sweetener while the milk is still fresh. Transfer the liquid into your glass storage jar and refrigerate it immediately. Homemade milk lacks the stabilizers and emulsifiers found in commercial brands, so it is best enjoyed when cold.
Flavor Variations to Try
Customizing your blend is one of the best parts of knowing how to make almond milk at home. Here are a few popular ways to elevate the flavor:
-
Vanilla Bean: Add 1 teaspoon of pure vanilla extract or the scrapings of one vanilla bean.
-
Naturally Sweet: Blend in 1-2 pitted Medjool dates during Step 3 for a caramel-like sweetness.
-
Chocolate Milk: Whisk in 1 tablespoon of raw cacao powder and a bit of maple syrup.
What to Do With Leftover Almond Pulp?
Do not discard the “meal” left in your nut milk bag! This pulp is highly nutritious and can be repurposed in several ways:
-
Almond Flour: Spread the pulp on a baking sheet and dry it in a low-temperature oven to create homemade almond meal.
-
Baking: Add it directly to muffin batters or energy ball recipes for added fiber.
Storage and Shelf Life
Because this milk is fresh and preservative-free, it has a shorter shelf life than carton milk. It typically stays fresh in the refrigerator for 3 to 5 days.
Pro-Tip: Separation is completely natural. Since there are no chemical binders, the cream and water will likely separate after a few hours. Simply give the jar a vigorous shake before pouring to recombine the ingredients.
Conclusion
Mastering how to make almond milk at home is a simple yet rewarding shift toward a more intentional kitchen. By following these five easy steps, you eliminate unnecessary additives, reduce environmental waste, and enjoy a superior flavor that store-bought cartons simply cannot match. Whether you’re splashing it into your morning coffee or using it as a base for nutritious smoothies, your homemade almond milk provides a clean, nutrient-dense alternative that fits perfectly into a healthy lifestyle.
Frequently Asked Questions
Q. Do I have to peel the almonds before blending?
A. No, it is not necessary. The skins are removed during the straining process in Step 4. However, some people prefer to use blanched almonds (skins removed) to achieve an even whiter milk and a slightly milder flavor profile.
Q. Why did my homemade almond milk separate in the fridge?
A. Separation is a sign of a high-quality, natural product. Commercial milks use emulsifiers like lecithin or gums to keep ingredients bonded. Since your DIY version is pure, the heavier nut particles naturally settle. Simply shake the jar before use.
Q. Can I make this with other nuts using the same method?
A. Absolutely. The same ratio and process work perfectly for cashews, hazelnuts, or macadamia nuts. Note that cashews are softer and often require less straining than almonds.
Q. Is it cheaper to make almond milk at home than to buy it?
A. It depends on the quality of almonds you purchase. While the upfront cost of a bulk bag of organic almonds may seem higher, the yield and the nutritional density of homemade milk—which contains significantly more actual nuts per serving than commercial brands—often provide better value for your money.
Q. Can I freeze homemade almond milk?
A. Yes, you can freeze it for up to three months. It is best to freeze it in ice cube trays for easy portioning in smoothies. Note that the texture may change slightly upon thawing, so it’s best used for cooking or blending rather than drinking straight.