How to Create a Sensory Bin for Toddlers in 5 Simple Steps
Introduction
Knowing how to create a sensory bin for toddlers is one of the most effective ways to encourage independent play and support early childhood development right from your kitchen table. At its core, a sensory bin is a tactile treasure chest—a simple container filled with varied textures, colors, and objects designed to stimulate a child’s senses. While it may look like just a tub of rice or beans, these bins are powerful educational tools that experts at Zero to Three emphasize as vital for helping toddlers explore their world through touch, sight, and sound.
Beyond just keeping little hands busy, sensory play offers significant cognitive benefits. According to Michigan State University Extension, engaging in hands-on learning with concrete objects leads to abstract thought as a child grows. Organizations like Action for Healthy Kids also highlight how these activities help children learn to self-regulate and manage stress. Whether you are looking to boost fine motor skills or simply need fifteen minutes of peace, mastering the art of the sensory bin is a parenting game-changer.
How to Create a Sensory Bin for Toddlers
Step 1: Choose Your Container
The first step in learning how to create a sensory bin for toddlers is selecting the right vessel. While it may be tempting to grab any old box, the container you choose dictates the “play boundaries” and determines how messy the activity will become. For most home setups, a clear plastic storage bin—specifically the shallow “under-bed” variety—is the gold standard. A depth of about 4 to 6 inches is ideal; it is shallow enough for a toddler to reach into comfortably while sitting on the floor, yet deep enough to keep the materials contained.
When selecting your container, consider these three factors:
-
Transparency: Clear bins allow toddlers to see the colors and shapes from the side, which enhances the visual stimulation of the activity.
-
Size vs. Space: If you have multiple children, a larger mortar mixing tub (available at hardware stores) provides enough surface area for “parallel play.” However, for a single toddler, a standard 15-quart bin is usually sufficient and easier to store.
-
The Lid is Key: Always choose a bin that comes with a secure, snapping lid. This allows you to put the activity away and bring it back out later, which is a great strategy for extending the novelty of a toy and reducing “toy fatigue.”
Safety is also paramount during this stage. Ensure the bin is made of BPA-free plastic and has rounded, smooth edges to prevent scratches. If you are looking for an even more ergonomic setup, many parents opt for a dedicated sensory table. Make sure to get a height-adjustable table that can grows with your child, helping to prevent the back strain that comes from leaning over a bin on the floor. You can find them here on Amazon.
Step 2: Select a Sensory Base (The “Filler”)
Once you have your container, the next step in how to create a sensory bin for toddlers is choosing the “base.” This is the primary material that fills the bin and provides the tactile foundation for the entire experience. The base is what a child will run their fingers through, pour, and sift, making it the most important element for sensory engagement.
When selecting a filler, you generally choose between three categories:
-
Dry Pantry Staples: These are the most popular and easiest to clean. Dried rice (plain or dyed with food coloring), chickpeas, black beans, and dried pasta shapes are excellent for pouring and provide satisfying auditory feedback.
-
Wet and Gooey Materials: For a more intense sensory experience, you can use water, “clean” mud (made of shredded paper and soap), or shaving cream. These varying textures help children develop “sensory processing” skills, teaching them how to respond to different physical sensations.
-
Taste-Safe Options: If your toddler is still in the “mouthing” stage where everything goes into their mouth, safety is the priority. Instead of raw beans or small beads, use crushed cereal (like Cheerios), oatmeal, or even edible “sand” made from graham cracker crumbs.
It is important to match the filler to your child’s developmental stage. For instance, while water beads are popular for their unique texture, they can pose a significant ingestion risk. The American Academy of Pediatrics (AAP) advises parents to avoid small, expandable materials like water beads for young children who might swallow them.
Pro Tip: To add an extra layer of engagement, consider the “scent” of your base. Adding a drop of lavender oil to rice or using cinnamon sticks in a fall-themed bin can turn a tactile activity into a multi-sensory learning session.
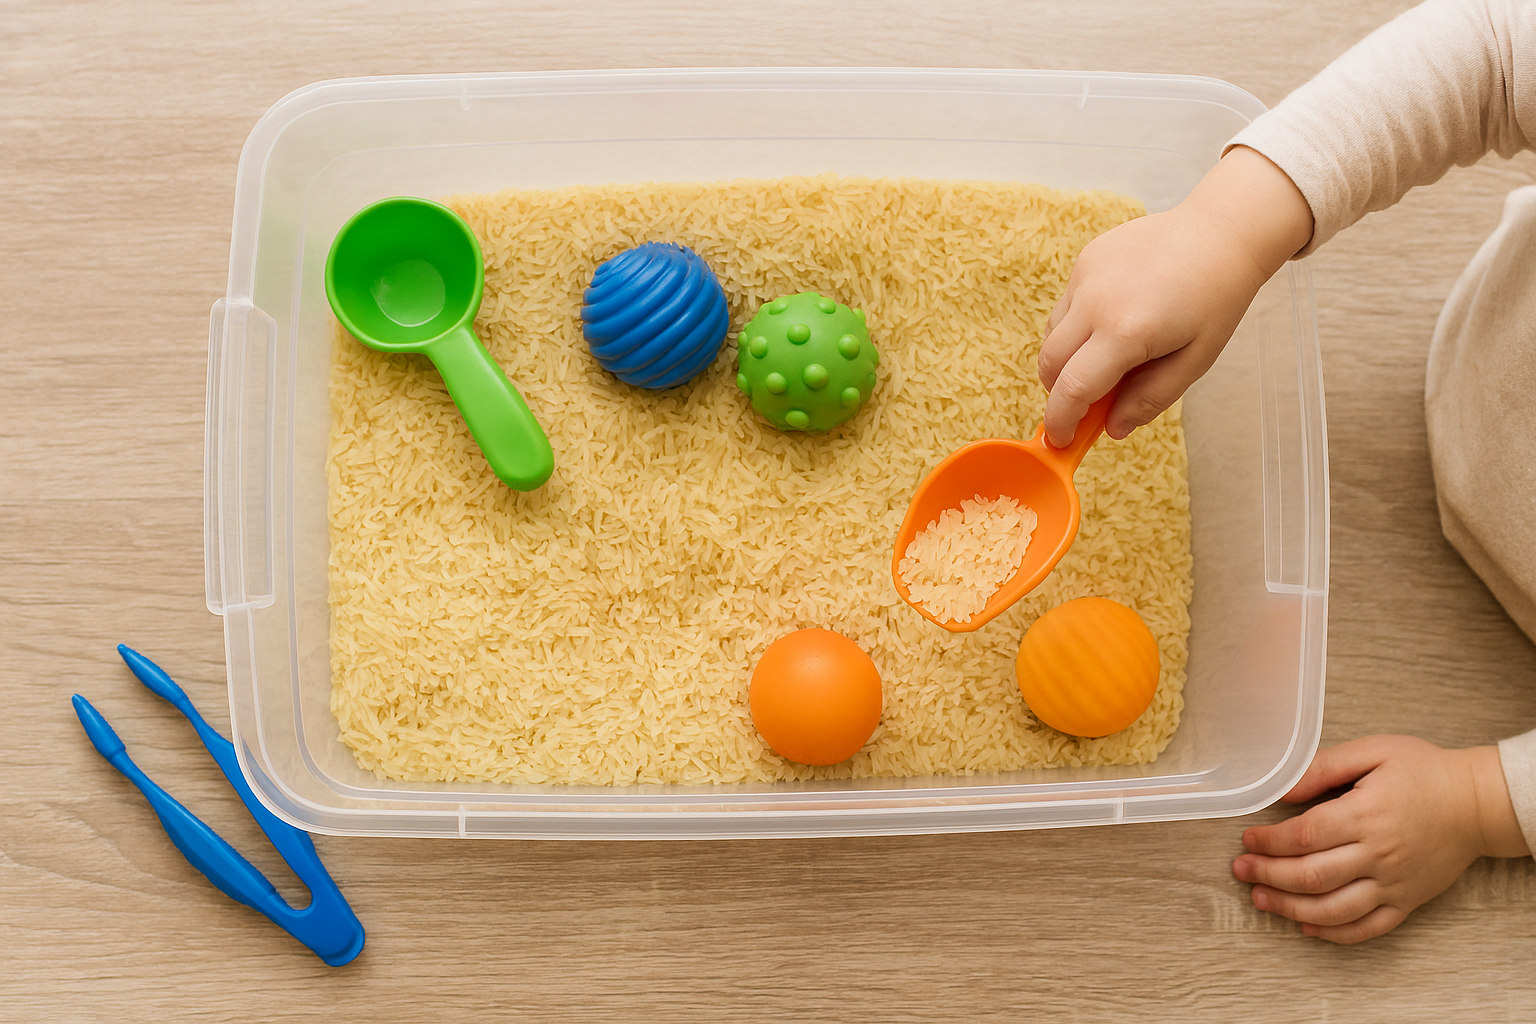
Step 3: Add Tools for Exploration
Now that you have a container and a base, the third step in how to create a sensory bin for toddlers is adding the tools that transform the bin from a box of material into an interactive laboratory. Tools are the bridge between the sensory material and the child’s development; they encourage “heavy work” for small hands and help refine the pincer grasp and hand-eye coordination.
To make the bin truly engaging, you should provide a variety of “manipulatives” that allow for different types of movement:
-
Scooping and Pouring: Traditional kitchen items are perfect here. Measuring cups, wooden spoons, funnels, and ladles allow toddlers to practice the physics of volume and flow.
-
Grasping and Squeezing: Tools like large plastic tweezers, tongs, or even clean turkey basters challenge a child’s fine motor strength. Using these tools helps develop the small muscles in the hand that are eventually needed for holding a pencil and using scissors.
-
Sorting and Organizing: Include small “sub-containers” like silicone muffin liners, ice cube trays, or small bowls. Toddlers are naturally driven by a developmental stage often called the “positioning schema,” where they find deep satisfaction in lining up, sorting, or categorizing objects by color or size.
When selecting tools, look for items with different weights and textures. A heavy metal spoon feels different against the hand than a light plastic one, and a soft silicone brush provides a different tactile “drag” through rice than a stiff whisk.
While it is tempting to crowd the bin with every toy in the playroom, “less is often more.” Providing a few open-ended tools allows a child to focus deeply on the task at hand rather than becoming overwhelmed by choice. Start with two or three tools and swap them out every few days to keep the activity fresh.
Step 4: Incorporate a Theme or Story
The secret to keeping a child engaged for long periods is adding a narrative element. While a bin of plain rice is fun, a “Construction Site” or “Arctic Rescue” mission is captivating. Learning how to create a sensory bin for toddlers involves using their natural imagination to turn a tactile task into a storytelling adventure.
Adding a theme gives the child a “mission,” which can significantly increase their attention span. Here are three popular themes to get you started:
-
The Construction Zone: Use a base of black beans or dried chickpeas (to look like rocks). Add small toy dump trucks, a few smooth stones, and some “road signs” made of popsicle sticks. This encourages the toddler to move material from one side of the bin to the other, mimicking real-world work.
-
The Seasonal Garden: Use green-dyed rice or split peas as the “grass.” Add silk flowers, small plastic pots, and a shovel. Toddlers love “planting” the flowers and then “harvesting” them back into a basket.
-
The Ocean Clean-up: Use water tinted with a drop of blue food coloring. Add plastic sea creatures and some “debris” (like clean bottle caps). Give your child a small net or a slotted spoon to “save” the animals.
When designing a theme, try to incorporate “loose parts.” These are materials that don’t have a fixed play purpose, such as pinecones, large buttons, or corks. Loose parts encourage divergent thinking—the ability to see many possible uses for a single object.
By rotating your themes every few weeks, you keep the sensory bin “new.” This strategy aligns with the principle of toy rotation, which suggests that limiting the number of toys available at one time leads to deeper, more concentrated play sessions.
Step 5: Set Up for Success (and Less Mess)
The final and perhaps most important step in how to create a sensory bin for toddlers is the environmental setup. Many parents avoid sensory play because they fear a “rice explosion” in their living room. However, by establishing a designated play zone and clear boundaries, you can minimize cleanup and maximize your child’s focus.
To ensure a stress-free experience, follow these preparation strategies:
-
The “Splat Mat” Strategy: Before you open the bin, lay down a barrier. A large fitted bed sheet is a veteran parent favorite because the elastic corners naturally pull upward, keeping stray grains of rice contained. Alternatively, a plastic shower curtain liner or a dedicated splat mat works perfectly for wet play, as it can be wiped down in seconds.
-
Establish the “Keep it in the Bin” Rule: Consistency is the key to managing mess. Before play begins, explain the boundaries. A simple mantra like, “The rice stays in the box; if it leaves the box, the lid goes on,” helps toddlers understand expectations. According to the American Academy of Pediatrics (AAP), play is the primary way children test boundaries and learn self-regulation, so use this as a gentle teaching moment rather than a point of frustration.
-
Make Cleanup Part of the Play: Instead of rushing to vacuum the second your child is finished, involve them in the restoration of the space. Give them a small dustpan and brush or a damp cloth to “rescue” stray beans. PBS LearningMedia highlights that cleanup routines teach toddlers responsibility and sorting skills, turning the end of an activity into a secondary learning opportunity.
Finally, consider the timing of your sensory session. Sensory bins can be used as “heavy work”—activities that provide proprioceptive input to the muscles and joints. As noted by Griffin Occupational Therapy, this type of input can be incredibly grounding and calming for a child who is feeling overstimulated or restless. If your toddler has the “zoomies,” a bin filled with heavy materials like dried beans for digging can help them settle down and focus.
Safety Guidelines for Sensory Play
While learning how to create a sensory bin for toddlers is an exciting project, safety must be your top priority. Because sensory bins often involve small “loose parts” and various textures, they require active supervision to ensure the experience remains both fun and out of harm’s way.
Before you hand over the scooper, keep these critical safety points in mind:
-
The “Choking Hazard” Rule: Many common sensory fillers, such as dried beans, chickpeas, and small pebbles, are considered small parts. The U.S. Consumer Product Safety Commission (CPSC) defines a choking hazard as any object that fits completely within a 1.25-inch diameter cylinder. You can review their official Small Parts Business Guidance to understand which dimensions are unsafe for children under three.
-
Avoid High-Risk Materials: Certain popular sensory materials carry hidden dangers. For example, the American Academy of Pediatrics (AAP) has issued specific, urgent warnings regarding the dangers of water beads. These beads can expand significantly inside the body and cause life-threatening internal obstructions if swallowed.
-
Active Supervision: A sensory bin is not a “set it and forget it” activity. You should remain within arm’s reach at all times. Purposeful play occurs when an adult is present to narrate the child’s actions, which helps build vocabulary and cognitive connections.
-
Allergy Awareness: If you are using food-based fillers like flour, pasta, or dyed rice, ensure they do not conflict with any known allergies.
By taking these precautions, you create a secure environment where your toddler feels free to explore, experiment, and learn without risk.
Conclusion
Mastering how to create a sensory bin for toddlers is one of the most rewarding “how-to” projects a parent can undertake. By following these five simple steps—choosing a durable container, selecting a safe filler, providing the right tools, creating a theme, and setting up for a mess-free experience—you are providing your child with more than just entertainment. You are creating a low-cost, high-impact learning environment that nurtures their curiosity and supports vital developmental milestones. Whether it’s a rainy afternoon or a quiet morning, a sensory bin is a reliable tool for meaningful, hands-on play.
And to further help out your toddler, check out our post: How to Make Healthy Snacks at Home.
Frequently Asked Questions (FAQ)
Q. What is the best age to start using sensory bins?
A. Most children can begin exploring sensory bins around 12 to 18 months, or once they have moved past the stage of putting everything in their mouths. However, you can start earlier with "taste-safe" bins using edible materials under strict supervision.
Q. How much filler do I actually need to buy?
A. For a standard 15-quart bin, about 5 to 10 pounds of a dry base (like rice or beans) is usually enough to provide a depth of 2 to 3 inches. This allows for plenty of scooping and burying without making the bin too heavy to move.
Q. How long do sensory bin fillers last?
A. Dry fillers like rice, pasta, and beans can last for months if they are kept dry and stored in a container with a sealed lid. If the materials get wet or soiled with food, it is best to discard them to prevent mold or bacteria growth.
Q. My toddler just throws everything out of the bin. What should I do?
A. This is a common developmental stage called the "discharging schema." To manage this, try using a larger "splat mat" or move the activity outside. You can also redirect them by saying, "The rice stays in the box," and briefly closing the lid to signal that the activity is paused until they are ready to keep the materials inside.
Q. Can I reuse the items I put in the bin?
A. Absolutely. One of the best ways to keep the activity fresh is through toy rotation. Limiting the number of toys available to a child helps them focus and play more creatively. Simply swap out the trucks for dinosaurs or the spoons for whisks to create a brand-new experience.