How to Start a Compost Bin in an Apartment in 4 Easy Steps
Starting a compost bin in an apartment is one of the most impactful ways to reduce your carbon footprint, even if your “outdoor space” is limited to a window sill. While many people assume that composting requires a massive backyard and a pitchfork, modern urban gardening techniques have made it possible to turn kitchen scraps into nutrient-rich soil right in your kitchen or under your sink. According to the Environmental Protection Agency (EPA), food scraps and yard waste currently make up more than 30% of what we throw away, making indoor composting a vital tool for waste reduction.
The process of indoor composting is surprisingly clean and efficient when done correctly. By managing your organic waste at home, you aren’t just creating a free fertilizer for your houseplants; you are actively preventing organic matter from ending up in landfills where it would otherwise release methane, a potent greenhouse gas. Organizations like the Natural Resources Defense Council (NRDC) emphasize that even small-scale urban efforts contribute significantly to soil health and environmental sustainability. Whether you are living in a tiny studio or a high-rise, this guide will show you exactly how to manage a successful, odor-free system in a limited square footage.
Addressing the Big Concerns of a Compost Bin in an Apartment
Many renters hesitate to start a compost bin in an apartment because they fear it will lead to unpleasant smells or an invasion of pests. However, these issues are entirely preventable with a basic understanding of the science behind decomposition. When a compost bin is managed correctly, it should have a neutral, earthy scent—similar to the smell of a forest floor after it rains.
Will It Smell?
The “rotting” smell people fear is usually the result of anaerobic decomposition, which happens when there isn’t enough oxygen. In a small apartment setup, you can prevent this by ensuring your bin has proper ventilation or by using a fermentation method like Bokashi. As noted by Cornell University’s Waste Management Institute, maintaining the right moisture level and airflow is key to keeping the process aerobic and odor-free.
Dealing with Pests
Fruit flies are the most common concern, but they are easily avoided by never leaving “green” waste (like fruit peels) exposed on the top of your bin. Always bury your fresh scraps under a layer of “browns”—dry materials like shredded newspaper or cardboard. If you are particularly worried about bugs, the NYC Compost Project recommends using a sealed container with a charcoal filter, which allows the bin to breathe while trapping any potential odors or insects inside.
Finding the Space
The beauty of urban composting is its versatility. You don’t need a dedicated “mudroom” or a balcony. Many apartment dwellers successfully tuck their compost bin in an apartment under the kitchen sink, inside a deep pantry drawer, or even in a corner of a utility closet. If you have absolutely zero floor space, some residents opt for the “freezer method,” storing scraps in a sealed silicone bag in the freezer until they can be dropped off at a local collection site, effectively eliminating the decomposition process entirely until it leaves the home.
Choose Your Method (Tailored for “Zero Space”)
Selecting the right method is the most important step in successfully maintaining a compost bin in an apartment. Because square footage is at a premium, you need a system that is compact, efficient, and fits your lifestyle. Here are the four best ways to manage organic waste in a small home:
Method 1: The Bokashi Bin (Best for Tiny Kitchens)
Unlike traditional composting, Bokashi is a fermentation process. You place your scraps in a specialized airtight bucket and add a “bran” inoculated with beneficial microbes.
-
Pros: It is incredibly fast and can handle meat, dairy, and oils—items usually forbidden in other bins.
-
Space Needed: Just a small corner under the sink.
-
The Output: A fermented “pre-compost” that needs to be buried in a planter or a “soil factory” (a bin of soil) to finish.
Method 2: Vermicomposting (The Worm Farm)
This method uses Red Wiggler worms to break down food scraps. While “indoor worms” might sound intimidating, they are clean, silent, and efficient.
-
Pros: It produces “worm castings,” which research published by the NIH confirms are packed with beneficial microorganisms that promote plant growth and suppress diseases more effectively than standard soil.
-
Space Needed: A shallow plastic bin or a stylish vertical tower like the Worm Factory 360.
-
The Output: Finished compost that can go directly into your houseplant pots.
Method 3: Countertop Electric Composters
For those who want a “set it and forget it” solution, electric devices like the Lomi or Vitamix FoodCycler are popular choices. These machines use heat and abrasion to dehydrate food scraps into a dry, soil-like material in just a few hours.
-
Pros: Zero smell, zero bugs, and lightning-fast results.
-
Space Needed: About the size of a bread maker on your countertop.
-
The Output: A “pre-compost” additive that reduces waste volume by up to 90%.
Method 4: The Freezer & Drop-Off Method
If you have truly zero space for a processing bin, you can still participate. Collect your scraps in a sealed container and keep them in your freezer to stop decomposition and odors. You can then take these frozen scraps to a local collection point. While some programs have changed, organizations like GrowNYC still facilitate food scrap drop-offs at various greenmarkets, and many cities now provide curbside organics collection.
Setting Up Your First Compost Bin in an Apartment
Setting up a compost bin in an apartment is a quick process that ensures your indoor ecosystem stays balanced from day one. Whether you are using a DIY bin or a purchased kit, the secret to success lies in the initial layering.
1. Select Your Container
If you aren’t using a specialized electric or Bokashi composting system, you can easily repurpose a 10-to-18 gallon plastic storage tote or a 5-gallon bucket. The Washington State University Extension recommends drilling approximately twenty 1/4-inch holes in the bottom for drainage and smaller 1/16-inch holes near the top edges for ventilation. If you are composting indoors without worms, a single bin with a tight-fitting lid and a charcoal filter is often preferred to manage airflow without letting odors escape.
2. Create the Foundation (The Bedding)
Every bin needs a base layer of “bedding” to act as a buffer for moisture and a home for beneficial microbes. You can order compost bedding from Amazon here or use shredded non-glossy newspaper, torn cardboard, or coconut coir. According to the Oregon State University Extension, bedding should be soaked for 24 hours and then wrung out until it feels like a damp sponge before being added to the bin. This ensures the environment is hospitable for decomposition without being waterlogged.
3. Understand the “Green and Brown” Balance
To prevent odors, you must maintain a proper ratio of Carbon to Nitrogen.
-
Greens (Nitrogen): These are your food scraps, coffee grounds, and fresh plant trimmings. They provide the protein for the microbes.
-
Browns (Carbon): These are dry materials like shredded paper or cardboard. They provide energy and keep the bin smelling fresh. The EPA’s Home Composting Guide suggests a ratio of two to three parts “browns” for every one part “greens.” Always finish your setup by covering your food scraps with at least two inches of dry bedding to “lock in” odors.
4. Adding Your First Scraps
When you first start your compost bin in an apartment, it is best to introduce food slowly. Start with about one pound of scraps and wait for the microbial activity to pick up before adding more. As the population of microbes (or worms) grows, they will process waste more quickly. To speed up the process, chop your scraps into small, one-inch pieces to increase the surface area for decomposition.
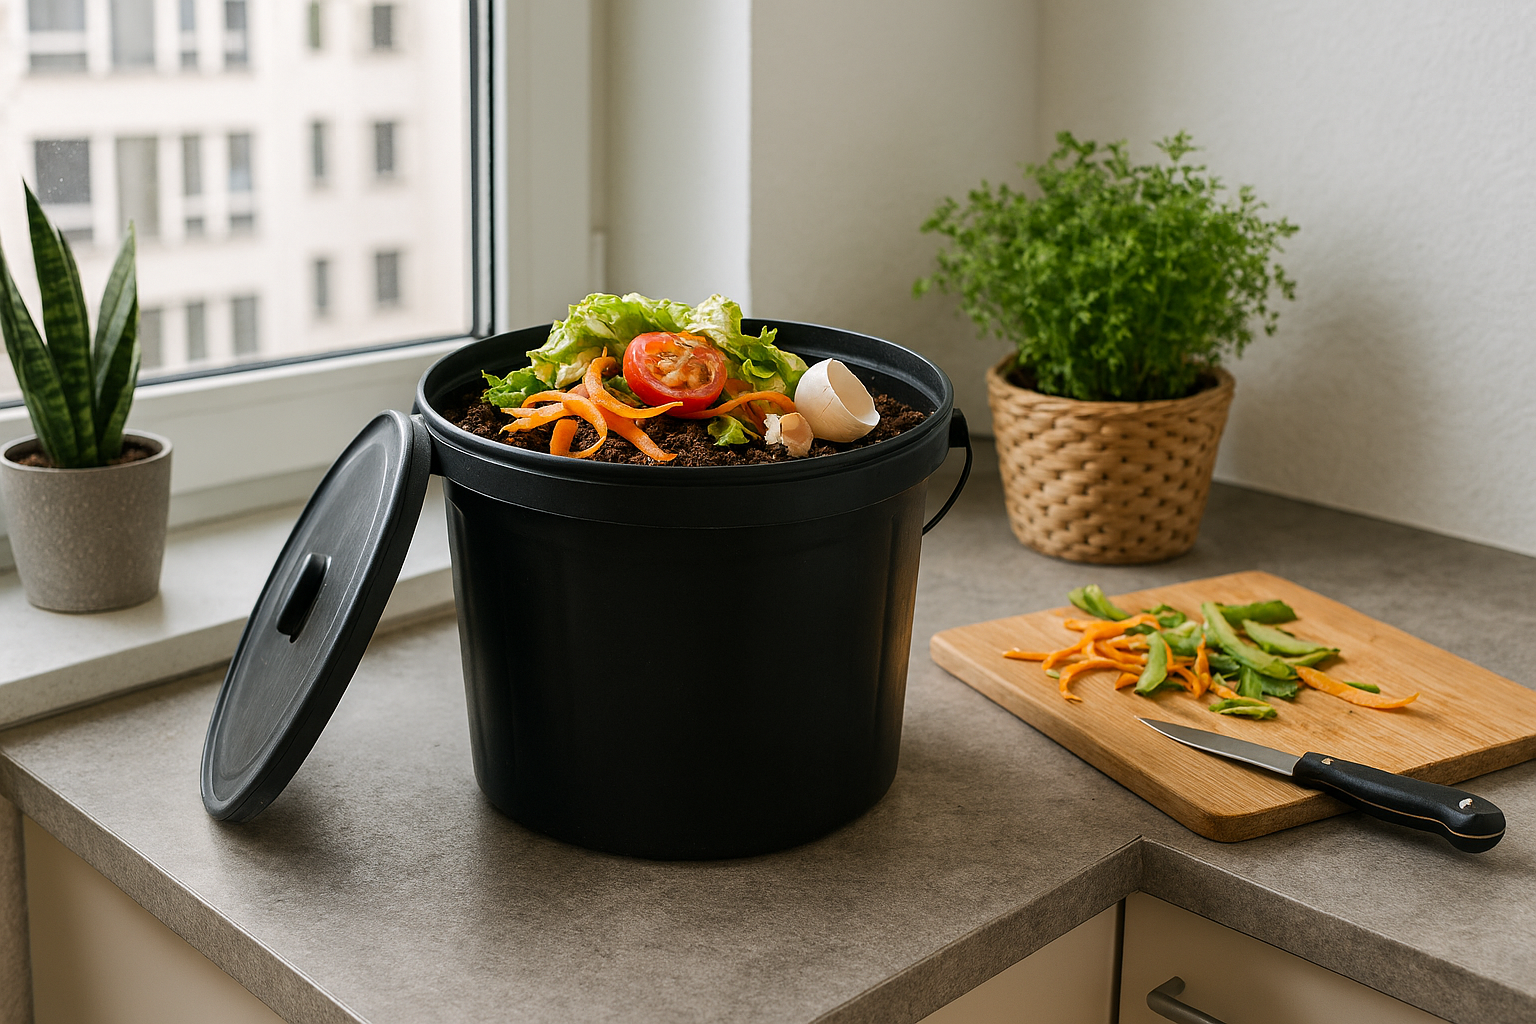
What Can (and Can’t) Go in Your Apartment Bin?
Maintaining a successful compost bin in an apartment depends heavily on what you choose to “feed” it. Because an indoor system is smaller and lacks the intense heat of a large outdoor pile, you must be selective to avoid odors and ensure the decomposition process stays active.
The “Green” List (Nitrogen-Rich)
These items provide the proteins and moisture needed for microbes (and worms) to thrive:
-
Fruit and Vegetable Scraps: Peels, cores, and ends. (Note: Limit citrus if using worms).
-
Coffee Grounds and Paper Filters: A stellar nitrogen source that also helps neutralize odors.
-
Loose Tea and Paper Tea Bags: Just ensure you remove any plastic mesh or staples.
-
Crushed Eggshells: According to Clemson University’s HGIC, eggshells provide essential calcium that improves the structure of your finished compost.
The “Brown” List (Carbon-Rich)
These dry materials provide energy for the microbes and prevent your bin from becoming a soggy, anaerobic mess:
-
Shredded Cardboard: Toilet paper rolls, egg cartons, and non-waxy delivery boxes.
-
Plain Paper: Shredded office paper or newspaper (avoid glossy inserts).
-
Dry Leaves: If you have access to balcony plants or dried yard trimmings.
-
Wood Shavings: Untreated sawdust or shavings provide high-carbon bulk.
What to Avoid (The “No” List)
To keep your compost bin in an apartment clean and pest-free, stay away from these items unless you are using a specialized fermentation system like Bokashi:
-
Meat, Fish, and Bones: These rot slowly and create foul smells that are manageable in a backyard but disastrous in a kitchen.
-
Dairy Products: Milk, cheese, and butter attract pests and lead to a slimy texture.
-
Oils and Greases: These coat other materials and block the oxygen necessary for aerobic composting.
-
Pet Waste: MSU Extension warns that waste from dogs and cats contains pathogens and parasites that can survive the low-temperature composting typical of indoor bins.
-
Glossy Paper and Stickers: Those tiny plastic produce stickers and shiny magazine pages do not biodegrade and will contaminate your soil.
| Item Category | Compostable? | Quick Tip |
|---|---|---|
| Banana Peels | Yes | Chop them into 1-inch pieces to speed up breakdown. |
| Onions/Garlic | Yes (Limited) | The EPA notes that these can be odorous; bury them deep to contain the scent. |
| Stale Bread | Yes | Break into small pieces; avoid if it has buttery or oily spreads. |
| Glossy Mail | No | The coatings often contain plastic or heavy metals that harm microbes. |
Maintenance and Troubleshooting
Once your compost bin in an apartment is established, it requires very little daily effort—usually just a few minutes a week. However, because you are managing a living ecosystem in a small space, staying ahead of potential issues is the best way to ensure your home remains odor-free and clean.
The Weekly Routine
To keep the process moving efficiently, perform a quick check-in once or twice a week:
-
Aeration: Use a small hand trowel or a sturdy stick to gently turn the top few inches of material. According to the University of New Hampshire Extension, regular aeration is the most effective way to prevent the “sour” smells associated with anaerobic decomposition by ensuring oxygen reaches the microbes.
-
The Moisture Test: Your compost should feel like a “wrung-out sponge.” If it’s too dry, the decomposition will stall; give it a light misting of water. If it’s too wet, it may begin to smell; simply mix in more dry “browns” like shredded cardboard.
| Problem | Likely Cause | The Quick Fix |
|---|---|---|
| Ammonia or Rotten Smell | Too many "greens" or too much moisture. | Add a thick layer of shredded paper and turn the pile to add air. |
| Fruit Flies | Exposed food scraps on the surface. | Ensure all food is buried at least 2 inches deep under a "brown" layer. |
| Process is Too Slow | Scraps are too large or the bin is too dry. | Chop scraps smaller and ensure the pile is as damp as a sponge. |
| Mold is Growing | High moisture (normal in small amounts). | If it's white/fuzzy, it's usually fine. If it's excessive, add more air and dry bedding. |
Preventing Pests Long-Term
If you find that fruit flies are still a nuisance despite burying your scraps, the Natural Resources Defense Council (NRDC) suggests a simple “pre-compost” step: freeze your food scraps for 24 hours before adding them to the bin. This kills any existing fruit fly eggs that may have come home on your produce from the grocery store.
Harvesting Your “Black Gold”
Depending on the method you chose, your compost will be ready in 2 to 6 months. You’ll know it’s finished when it looks like dark, crumbly soil and you can no longer recognize the original food scraps. To use it in a small apartment, the USDA People’s Garden initiative recommends mixing finished compost into your soil to feed plants naturally, or using it as a top-dressing for houseplants to provide a slow-release nutrient boost.
Conclusion
Setting up a compost bin in an apartment is more than just a hobby; it is a direct action against the global food waste crisis. By diverting your kitchen scraps from the landfill, you are significantly reducing methane emissions and taking a tangible step toward a circular economy. Over 1 billion tonnes of food are wasted annually worldwide, and localized efforts—like apartment composting—are essential to meeting sustainability goals.
Whether you choose the silent work of a worm bin, the speed of an electric composter, or the simplicity of a freezer drop-off, you are proving that urban living doesn’t have to be disconnected from nature. Your houseplants will thrive, your trash will be lighter, and you’ll find a surprising sense of satisfaction in watching your “waste” transform into life-giving soil.
Want to further improve your home? Read our article on How to Live a Sustainable and Healthy Lifestyle.
Frequently Asked Questions (FAQ’s)
Q. Can I put citrus peels in my worm-based compost bin in an apartment?
A. Use them sparingly. While citrus is fine for Bokashi or electric systems, worms (Red Wigglers) generally dislike the acidic oils found in orange and lemon peels. Too much can throw off the pH of your bin and irritate the worms.
Q. How often should I harvest my apartment compost?
A. For most indoor bins, you can expect to harvest every 3 to 6 months. You’ll know it’s ready when the material is dark, crumbly, and has a pleasant, earthy scent. If you can still identify the shape of a banana peel, it needs more time.
Q. Does an indoor compost bin generate heat like a large outdoor pile?
A. Generally, no. Small apartment systems are considered "cold composting." Because the volume of material is small, it doesn't reach the high temperatures required to kill weed seeds or pathogens.
Q. What do I do if my bin attracts fruit flies?
A. First, ensure all food scraps are buried deep under your "browns" (shredded paper/cardboard). You can also use a fine mesh screen over any air holes. If the infestation is already present, a small vinegar trap next to the bin usually clears them up within 48 hours.
Q. Can I use the finished compost for all my houseplants?
A. Yes! However, because it is highly concentrated, it is best to mix it with existing potting soil. A common ratio is one part compost to three parts soil. It’s a natural, slow-release fertilizer that provides nutrients without the risk of "burning" delicate roots with synthetic chemicals.